Luxurious style! Do it yourself – stylish jacket and pants
Create a truly luxurious look! After all, stylish laconic garments would tell a lot about your impeccable taste. Our original suit, consisting of cropped vest and wide long trousers, is the best proof of this. The suit is made of natural linen of rich black color.
We invite you to model and sew this costume yourself. Let’s start with the vest! We will provide you with step-by-step instructions for developing a pattern and sewing a women’s vest. Detailed instructions are in this tutorial!
To contents ▴Pattern of a women’s vest
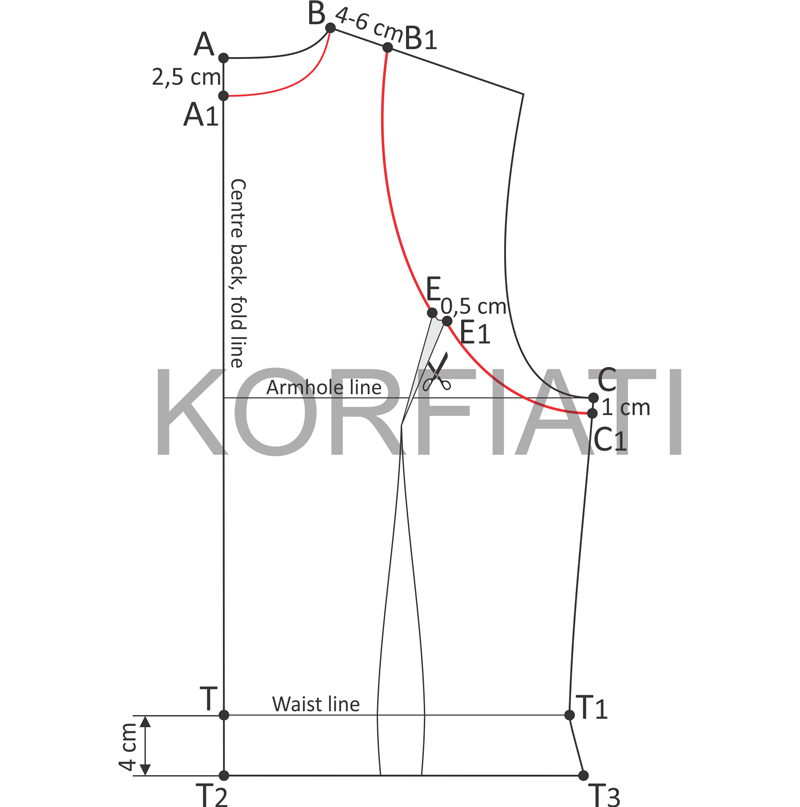
Use the basic dress with darts traced up to the hip level with ease allowance 1,5-2 cm.
Back pattern
- AA1 = 2,5 cm. Draw the neckline A1B as shown on the diagram.
- BB1 = 4-6 cm (not a fix measurement, depend of the size).
- CC1 = 1 cm (deepening of the armhole). Draw an armhole line B1C1. For a better fit of the armhole, reduce the length of the armhole: EE1 = 0,5 cm. Close the small dart on the paper pattern.Close the chest dart too.
- TT2 = 4 cm. Draw the bottom line T2T3 parallel to TT1 (Waist line).

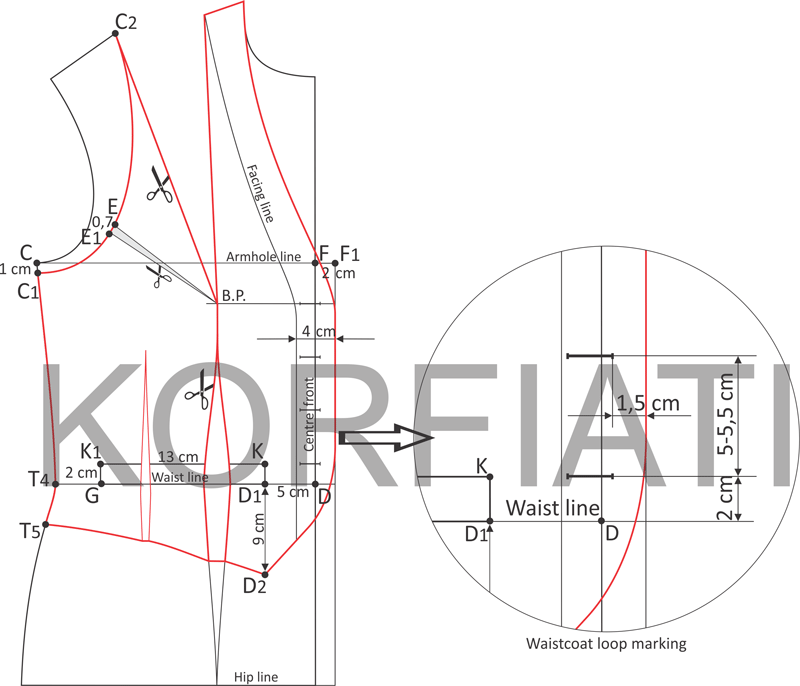
Fig. 2. Women’s vest – front pattern
Front pattern
- CC1 = 1 cm. Draw the armhole line C1C2. If the length of the back shoulder is more than 4 cm, the point C2 will shift to the left. For the better fit of the armhole area, reduce the length of the armhole: EЕ1 = 0,5 cm. Close the dart on the paper pattern.
- T4T5 = T1T3 (Back).
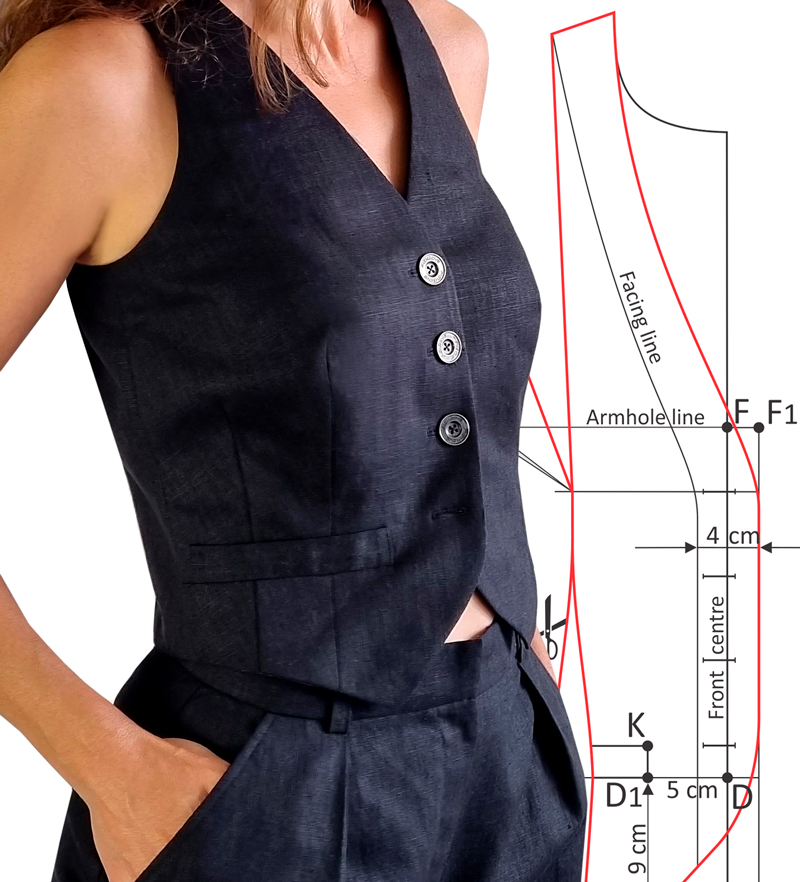
- FF1 = 2 cm. Square wright 2 cm for button stand.
- Left pocket: DD1 = 5 cm. KK1 = DG1 = 13 cm, KD1 = K1G = 2 cm.
- Bottom line: D1D2 = 9 cm. Draw the bottom line as shown on diagram.
- Facing line. Draw the Facing line as shown on diagram. Copy the Facing part from the front pattern and cut it separately.

Fig. 3. Women’s vest – front pattern
Marking loops
Mark the bottom loop 2 cm above the waist line, the top loop at the level of the Center Bust Point line. Measure the distance between the top and bottom loops and divide by three. The estimated distance between the loops is about 5-5,5 cm (the value depends on the size and may vary slightly). Mark four buttonholes about 2 cm each as shown on the diagram (stitch size = button diameter + button thickness).
Details of the fabric cut are shown on fig. 4. Required fabric length 140 cm х 0,7 m.

Fig. 4. Pattern of a women’s vest – parts of cut
Tips for cutting and sewing the vest
Tips for cutting and sewing the vest follow the link How to sew a single-breasted vest

Fig. 5. Tips for cutting and sewing a vest
If you want to sew not only a vest, but also trousers, a pattern of long wide ones, follow the link Pattern of wide trousers
More patterns and sewing ideas you can find on Anastasia Korfiati Sewing School website. Subscribe free to our tutorials and receive new patterns in the first!
You might be interested in:
- Women’s Measurements Charts
- Palazzo pants pattern
- Basic dartless dress pattern
- Longsleeve – simple sewing pattern


