Download the Ready-to-Sew Shirt Jacket Pattern
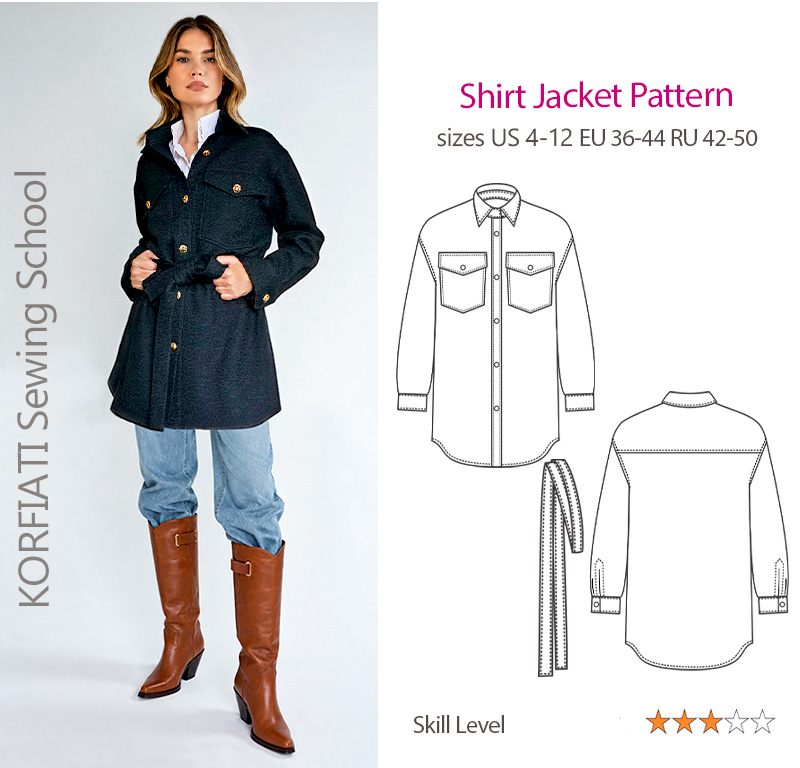
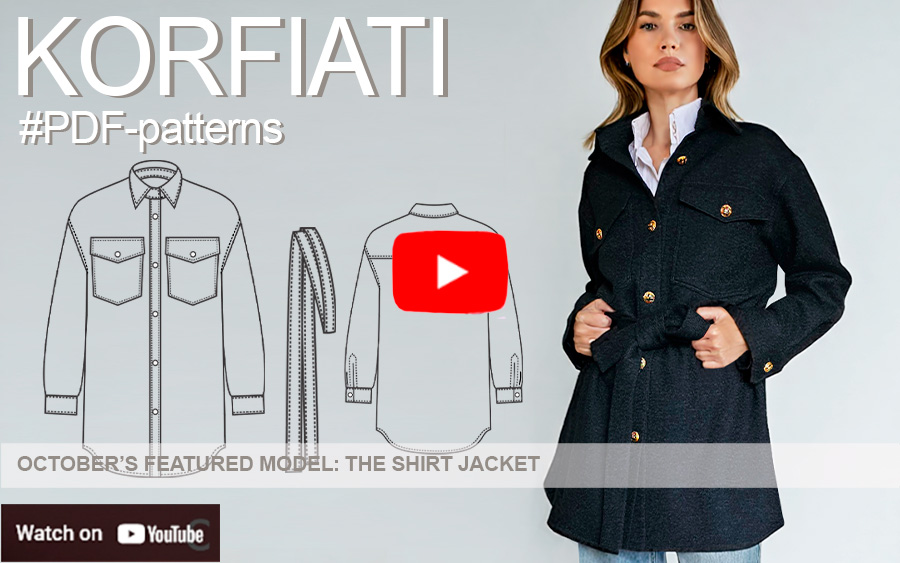
What could be as warm as a coat, as lightweight as a jacket, and as comfortable as a shirt? A shirt jacket (or “shacket”), of course — made from soft wool coating with a delicate bouclé texture. And if some of our readers feel they lack the sewing experience to tackle a classic coat or tailored jacket, we can assure you that this shirt jacket is a particularly rewarding project. It is not only stylish and warm, but also surprisingly easy to sew.
Soft bouclé wool is forgiving of minor sewing imperfections and small inaccuracies, making this an approachable project even for beginners. You can work on the garment with confidence and enjoy the process – and the finished result, a stylish and cozy shirt jacket made by your own hands, is sure to become a favorite in your fall and winter wardrobe.
To contents ▴Shirt Jacket: Design Features
The shirt jacket features many of the signature details of a shirt-style coat (we published the pattern in one of our previous tutorials), with a few distinct differences. The downloadable PDF pattern is graded for standard sizes 42–50. The finished back length for sizes 42–50 is 83 cm (32 5/8″) – 83.5 cm (32 7/8″) – 84 cm (33″) – 84.5 cm (33 1/4″) – 85 cm (33 1/2″), respectively.
- The silhouette is straight with subtle shaping for a comfortable fit and ease of movement, while the waist is gently defined with a soft tie belt.
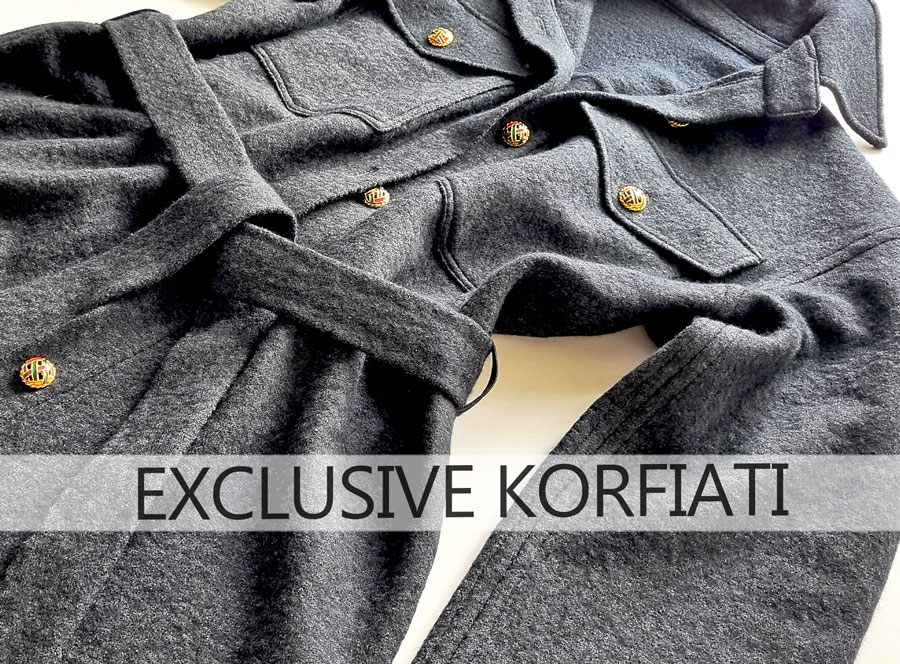
Fig. 1. Shirt jacket features: a relaxed, straight silhouette with a soft waist belt
- The back yoke is unlined and cut straight, providing a comfortable shoulder fit and a clean, neat finish.
- The front fastening features a cut-on button placket.
- The fronts feature large patch pockets with flaps.
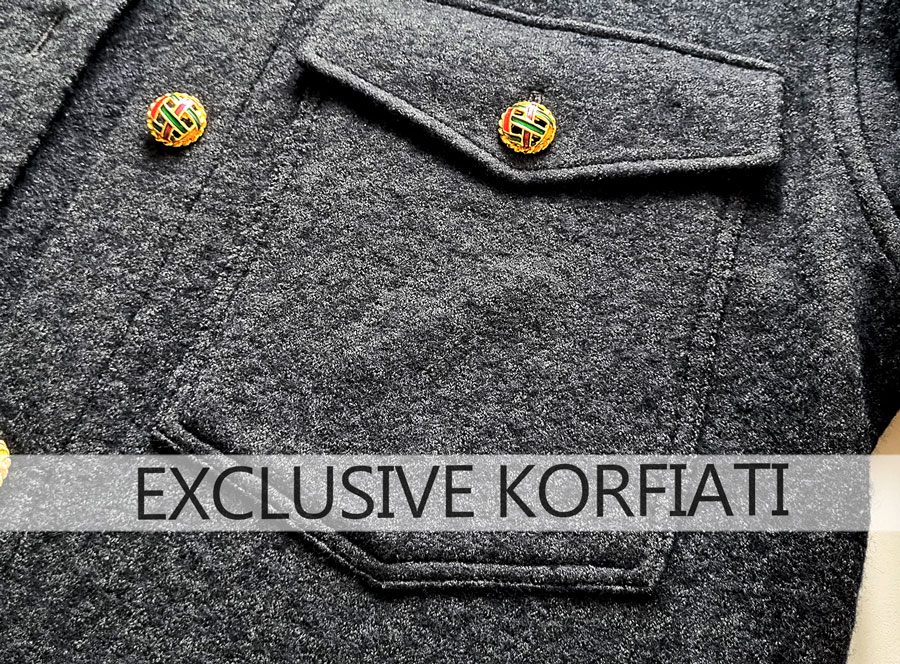
Fig. 2. Shirt jacket features: large patch pockets with flaps
- The sleeves are slightly elongated and feature a sleeve placket at the lower edge.
- The cuffs are rectangular and fasten with buttons.
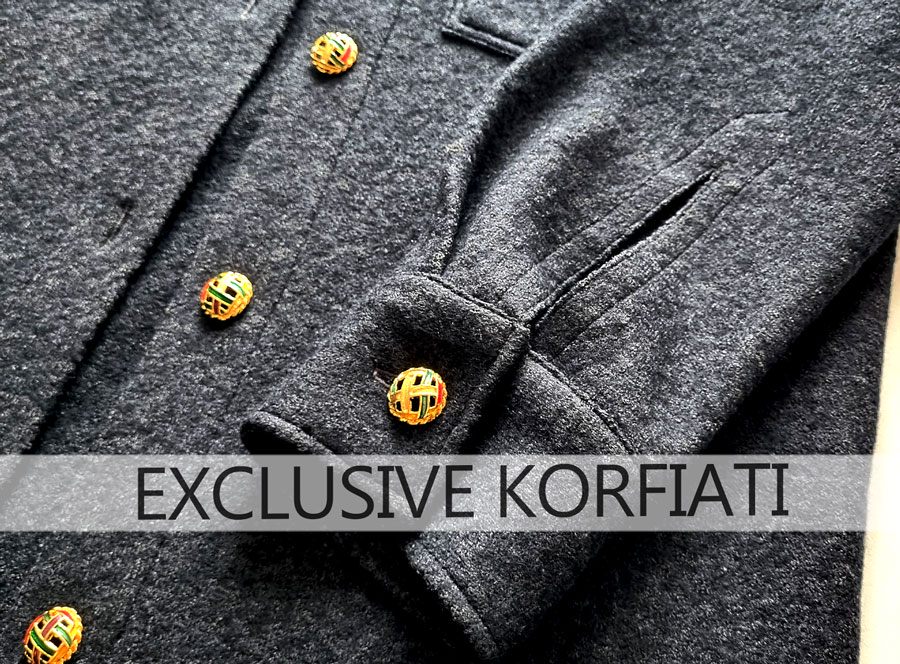
Fig. 3. Shirt jacket details: rectangular buttoned cuffs
- The two-piece shirt collar is set on a collar stand.
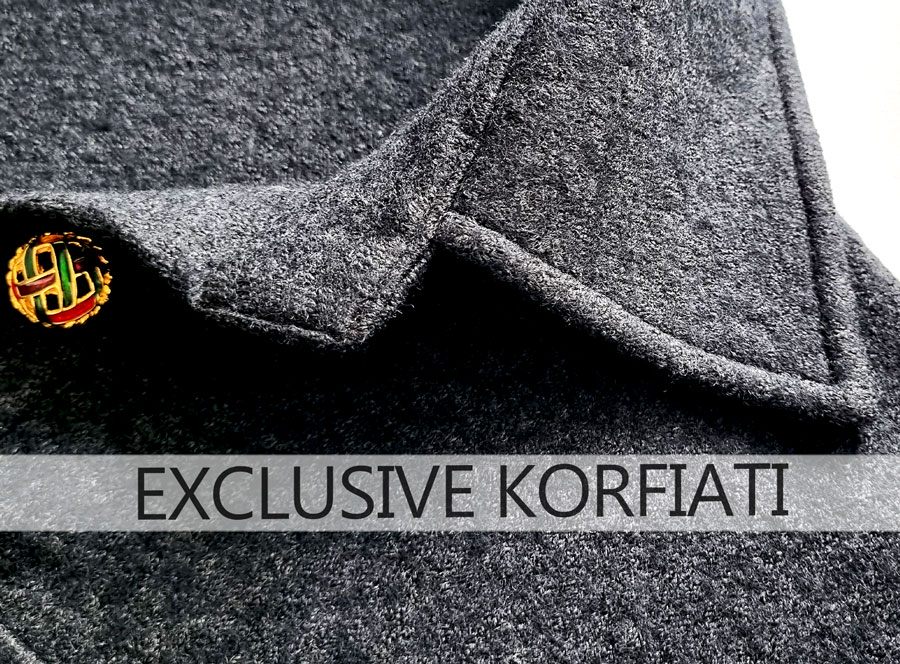
Fig. 4. Shirt jacket features: collar with stand
- The hemline is gently curved, creating a soft shirttail hem at the sides.
- The garment is unlined, with all internal seams neatly enclosed using the following techniques: flat-felled seams (yoke, shoulder seams, and armholes), clean-finished seams (pressed open with raw edges turned under and stitched for side and sleeve seams), and a double-fold hem with the raw edge enclosed (lower hem).
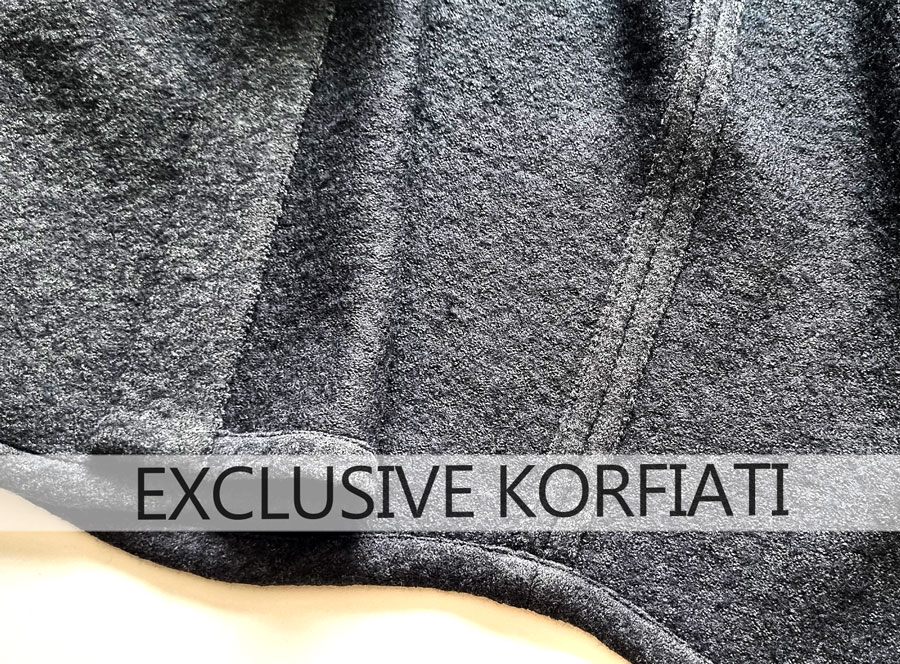
Fig. 5. Shirt jacket features: inside view – hem and side seams
Style Tip! This shirt jacket can be made not only from medium-weight wool coating, but also from heavyweight corduroy, loden, or brushed-back sweatshirt fleece.
To contents ▴Styling Tips
The shirt jacket is remarkably versatile and can be styled in countless ways. For an effortlessly polished look, pair it with classic jeans, skirts, T-shirts, or turtlenecks, and finish with loafers or ankle boots. A crisp white shirt instantly gives the outfit a more elevated feel.
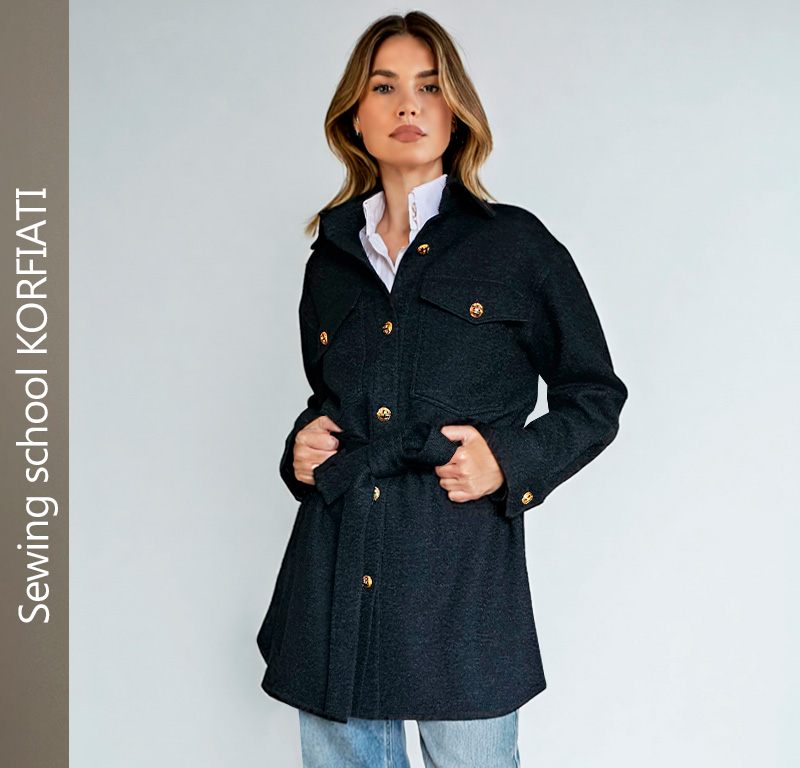
Fig. 6. Styling the shirt jacket with a white blouse and jeans
Statement accessories — oversized earrings and rings — can instantly take the look into evening territory.
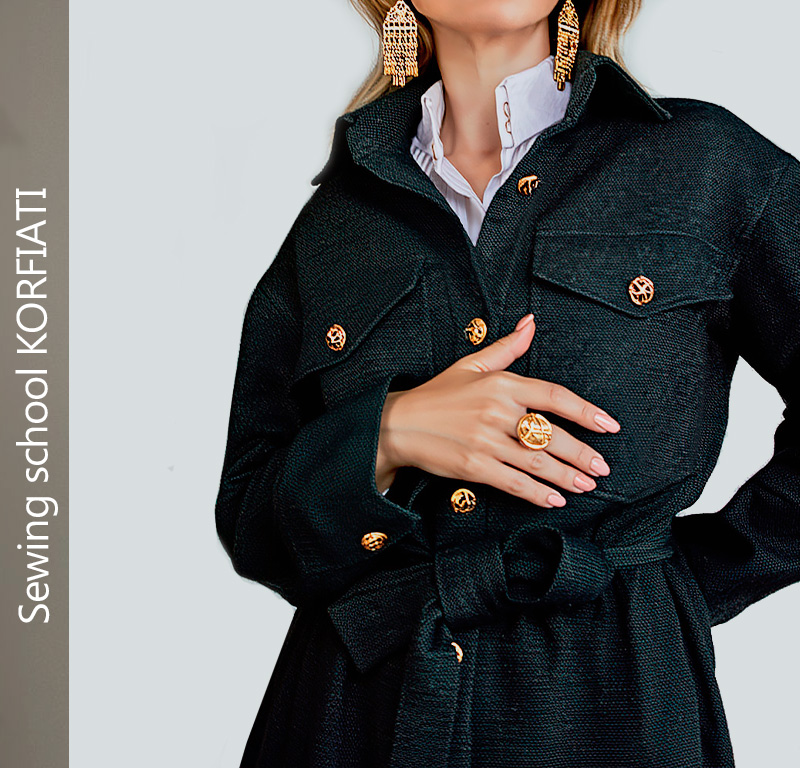
Fig. 7. Statement accessories give the look a distinctly glamorous evening feel
For colder days, layer the shirt jacket under an oversized coat and pair it with tall boots. If you would like to recreate the complete look shown in Fig. 3, you can find the coat pattern here: Double-Breasted Coat Pattern and Oversized Shirt Pattern.
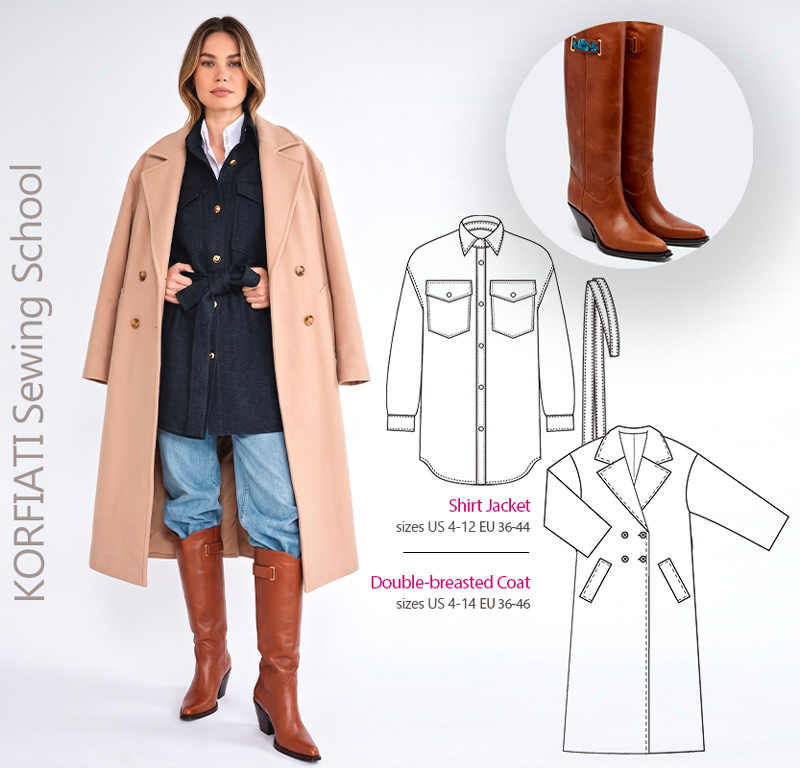
Fig. 8. Oversized shirt, shirt jacket, and double-breasted coat
Download & Print the Pattern
The ready-to-use shirt jacket pattern is graded for five standard sizes, from 42 to 50. The finished bust ease is approximately 12 cm (4 3/4″), while the sleeve width includes approximately 14 cm (5 1/2″) of ease. The finished back length varies by size from 83 cm (32 5/8″) to 85 cm (33 1/2″): 83 cm (32 5/8″) – 83.5 cm (32 7/8″) – 84 cm (33″) – 84.5 cm (33 1/4″) – 85 cm (33 1/2″). The front and back views of the shirt jacket are shown in Fig. 9.
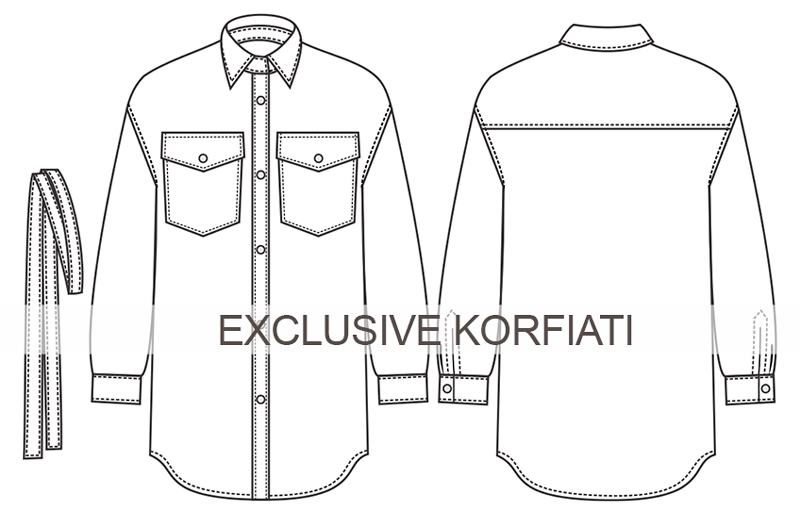
Fig. 9. Front and back views of the shirt jacket
The pattern is provided in two formats: a full-size version and a tiled version for printing on A4 sheets. If you print the pattern on A4 paper, the sheets must be assembled after printing. Each sheet includes a basic alignment grid, making assembly straightforward – simply use tape or a glue stick and scissors. For detailed instructions, see How to Check a Ready-to-Use Sewing Pattern.
To download the ready-to-use shirt jacket pattern, click the icon below.
Download pattern
How to Check the Ready-to-Use Shirt Jacket Pattern
The pattern sheet is shown in Fig. 10. To check the print scale, each sheet with the ready-to-use pattern includes a 100 × 100 mm (3 15/16″ × 3 15/16″) test square. Why is this necessary? Depending on your printer settings, the printer may automatically scale down the image. Make sure that your printer is set to print at Actual Size or 100% scale. Always measure the test square after printing and check the assembled pattern carefully to avoid fitting or construction errors.
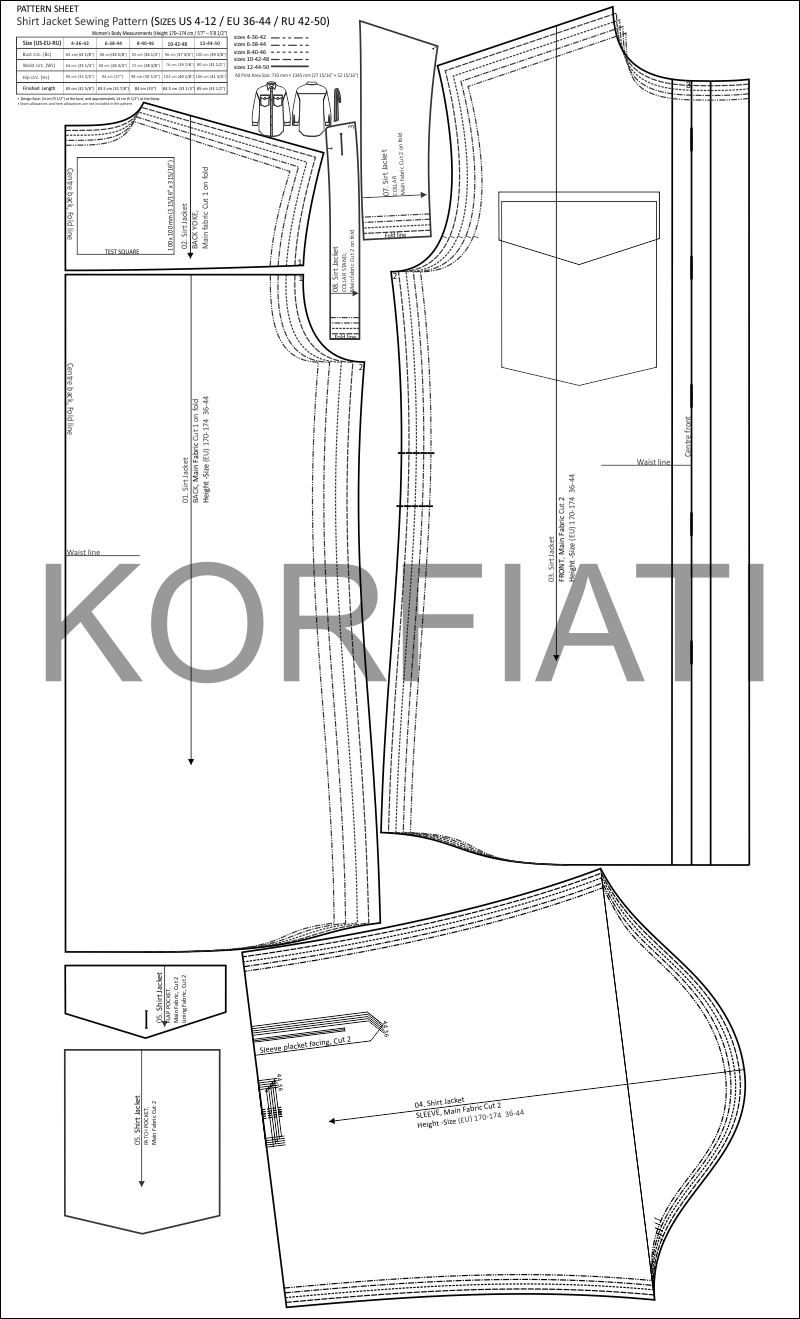
Fig. 10. Pattern sheet for the shirt jacket, sizes US 4-12, EU 36–44
Pro tip! An easy way to check the finished pattern is to cut out the paper pattern pieces for your chosen size along the outlines and join them at the seamlines with small pieces of masking tape. Carefully try on the resulting paper mock-up. This will give you a clear idea of the garment’s proportions and construction, and if you notice any obvious issues with volume or length, you can adjust the pattern before cutting into your fabric.
To contents ▴Cutting Instructions
Download and print the pattern, assemble the sheets. Select your size from the size table (Fig. 5). Seam allowances and hem allowances are not included in the pattern.
Using pattern grading, you can reduce the pattern to size US-EU-RU 2-34-40 or enlarge it to size US-EU-RU 14-46-52.
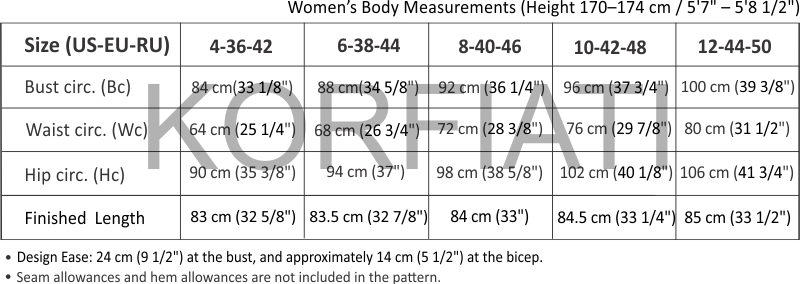
Fig. 11. Women’s key body measurements, sizes US 4-12/ EU 36-44 /RU 42-50
Materials & Notions
For the shirt jacket, you’ll need:
- approximately 2.0 m (2 1/4 yd) of soft, medium-weight wool coating, 145–150 cm (57–59″) wide
- 0.2 m (1/4 yd) of poplin for the underflaps and sleeve placket facings
- 9 metal shank buttons, approximately 2 cm (3/4″) in diameter
- fusible interfacing for the plackets, collar, and cuffs
- sewing thread.
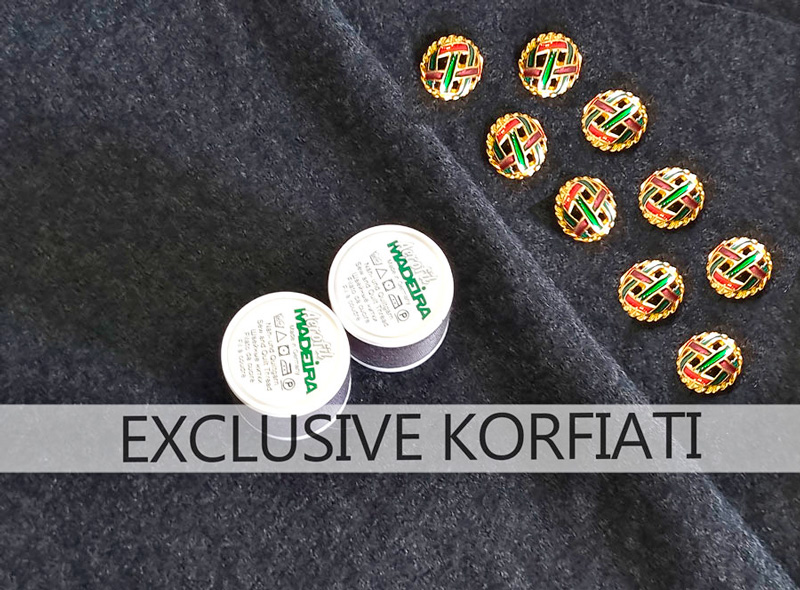
Fig. 12. Materials & Notions
Sewing Equipment
- Sewing machine — for assembling seams and finishing seam allowances.
Recommended Fabrics
Recommended fabrics: Soft, medium-weight coatings such as loden, wool, and cashmere.
Cut the following pieces from the main fabric:
- 01. Back – cut 1 on the fold
- 02. Back yoke – cut 1 on the fold
- 03. Front – cut 2
- 04. Sleeve – cut 2
- 05. Patch pocket – cut 2
- 06. Pocket flap – cut 2
- 07. Collar – cut 2 on the fold
- 08. Collar stand — cut 2 on the fold
- 09. Waist belt – cut a rectangle 10 cm (4″) wide, 5 cm (2″) finished, and approximately 170 cm (67″) long (180 cm (70 7/8″) for size EU 44).
- 10. Cuff – cut two rectangles, 14 cm (5 1/2″) wide, 7 cm (2 3/4″) finished, with the following finished lengths: size 42 – 31 cm (12 1/4″); size 44 – 32 cm (12 5/8″); size 46 – 33 cm (13″); size 48 – 34 cm (13 3/8″); size 50 – 35 cm (13 3/4″).
Cut the following pieces from black poplin:
- 06. Pocket flap (underflap) – cut 2
- 11. Sleeve placket facing – cut 2
Cut all pattern pieces with 1.5 cm (5/8″) seam allowances and a 2.5 cm (1″) hem allowance along the lower edges of the back and fronts.
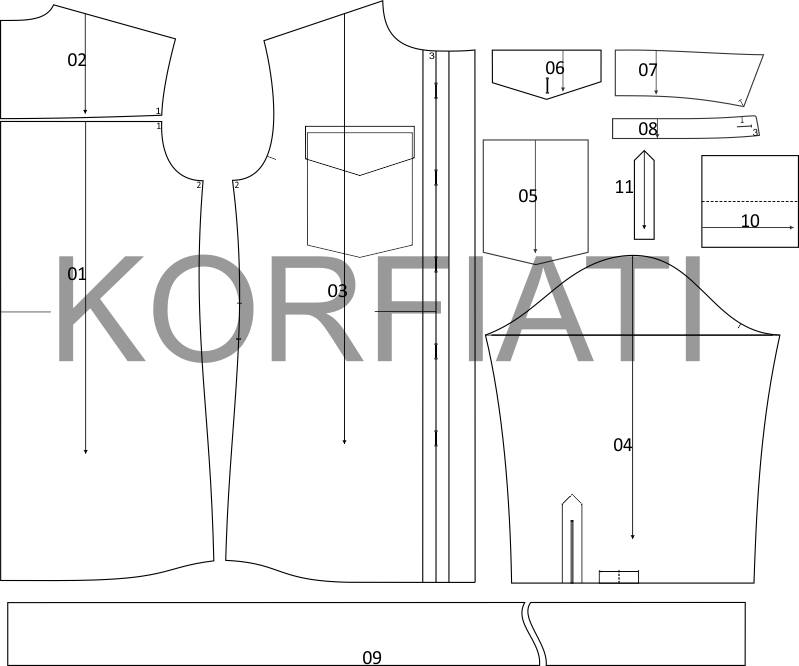
Fig. 13. Shirt jacket pattern pieces
Sewing Instructions
Important! Remember to press every seam as you sew, and use the appropriate pressing techniques for individual garment sections and details. Set your iron to the recommended temperature for your fabric and always test it first on a scrap of the same material (!).
Sewing sequence:
- Apply fusible interfacing to the upper pocket flaps and finish the underside of the flaps with poplin. Topstitch the patch pockets and flaps to the fronts using two parallel rows of stitching.
- Apply fusible interfacing to the cut-on front plackets, fold them along the marked foldlines, and press. Turn under the raw seam allowance and edgestitch close to the folded edge. On the right front, work the buttonholes according to the markings.
- Attach the back yoke to the back using a flat-felled seam. Sew the shoulder seams with flat-felled seams. Sew the side seams, press the seam allowances open, turn the raw edges under, and stitch them down (clean finish).
- Set the collar with stand into the neckline.
- Turn under the shirt jacket hem allowance and stitch in place.
- Finish the sleeve plackets with shaped facings. Place the facing right sides together with the sleeve, matching the markings, and stitch in place along both sides of the slit. Clip into the opening, turn the facing to the wrong side, and press. Turn under the facing edges and edgestitch them neatly in place.
- Sew the sleeve seams, press the seam allowances open, turn the raw edges under, and stitch them down. Form the sleeve pleats according to the markings, baste them in place, and attach the cuffs. Work the buttonholes on the cuffs and sew on the buttons.
- Set the sleeves into the armholes, easing the sleeve caps slightly. Press the armhole seam allowances toward the garment, turn under the raw edges, and edgestitch in place (creating a faux flat-felled finish).
- According to the markings, stitch the belt loops to the side seams.
- Sew the buttons to the right front.
- Stitch the waist belt, press it, and thread it through the belt loops.
For even more full-size patterns to download, visit the PDF Pattern Library section on the Korfiati Sewing School website. Our collection is constantly growing, so subscribe to our free sewing tutorials and join us in creating beautifully made, fashion-forward garments.



No Comments