This Season’s Must-Have: How to Draft a Custom Stirrup Pants Pattern
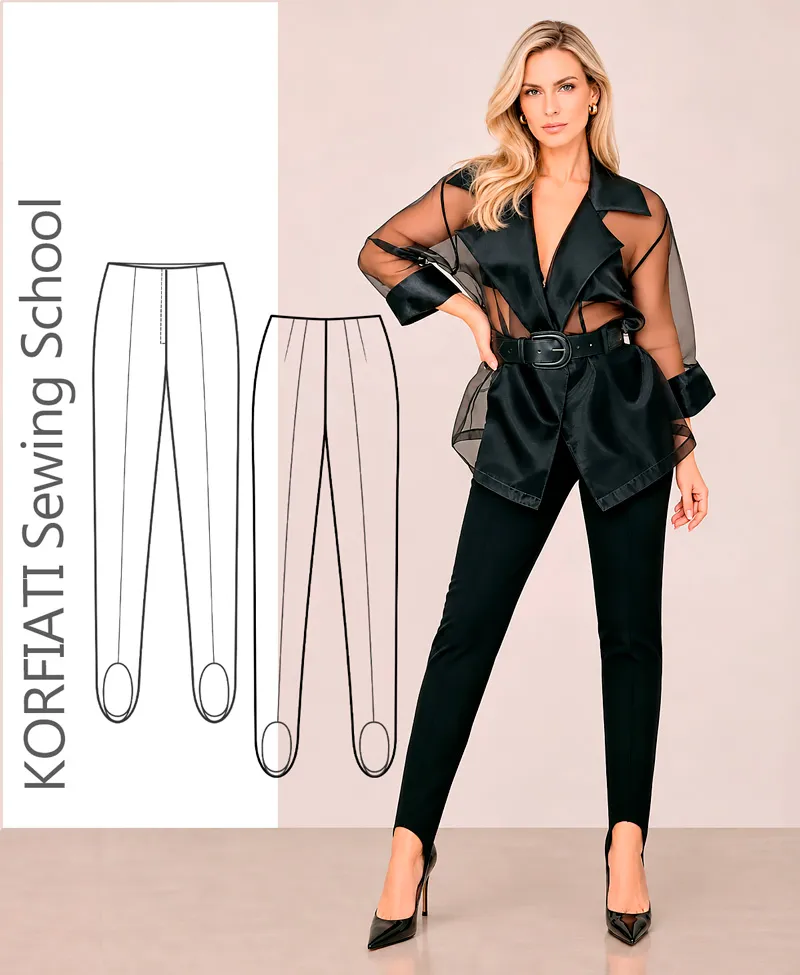
Stirrup pants are making a stylish comeback, bringing a sleek, modern edge to everyday wardrobes. Flattering and effortlessly chic, they’re a versatile staple you can dress up or down. In this tutorial, we’ll walk you through a step-by-step stirrup pants pattern drafting guide so you can create a pattern in any size and tailor it to your exact measurements.
To draft your stirrup pants pattern, start with a basic pants block you have on hand. If you don’t have one, you can download a ready-made basic pants pattern from our website or draft one from scratch using your personal measurements.
To contents ▴The History of Stirrup Pants
Stirrup pants trace their origins to equestrian wear, where practicality was just as important as appearance. The strap passing under the foot kept the pant leg smooth and securely tucked inside riding boots, preventing the fabric from bunching or riding up during movement. Over time, this functional detail migrated from sportswear into everyday fashion, where it was reinterpreted in a more refined, elegant way.
Their popularity surged in the late 20th century, as fashion embraced clean lines, slim silhouettes, and a dynamic, modern aesthetic. Stirrup pants struck the ideal balance between comfort and polish: they visually lengthened the legs, flattered the figure, and stayed impeccably in place all day. Today, the style continues to attract attention for the way it blends everyday practicality with a subtle, chic edge.
To contents ▴How to Style Stirrup Pants
One of the biggest advantages of stirrup pants is their versatility. Depending on the look you want to create, you can pair them with structured blazers, fitted bodysuits, crisp button-downs, lightweight tops, or flowing tunics. For a more relaxed, cozy feel, they also work effortlessly with oversized sweaters, soft cardigans, and chunky knitwear, creating a flattering contrast against their slim silhouette.
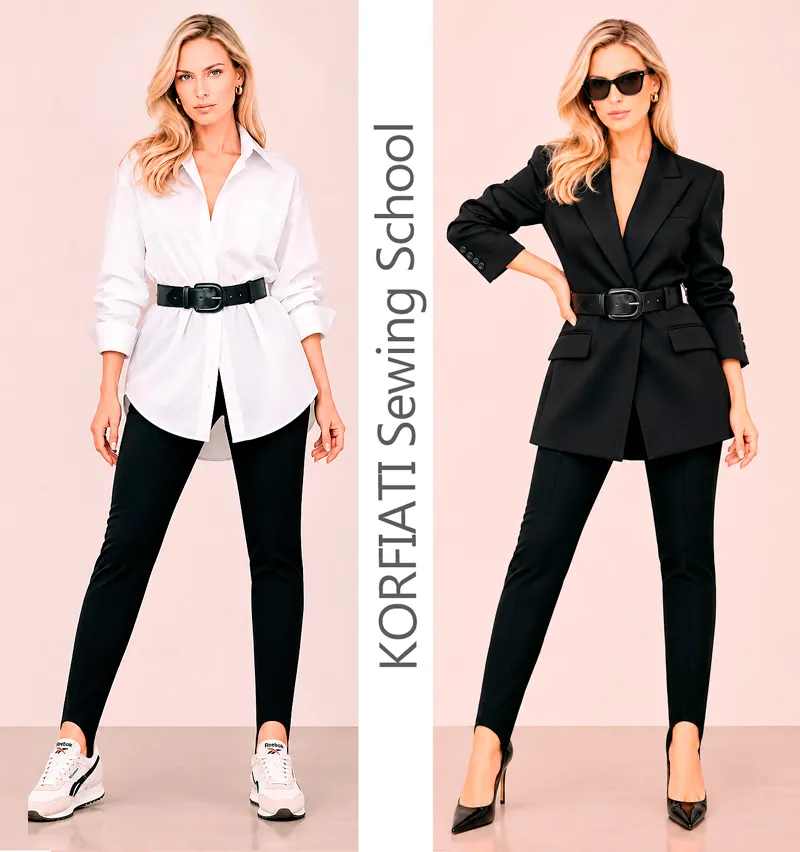
Fig. 1. How to Style Stirrup Pants
The styling possibilities are practically endless, which is why stirrup pants remain such a versatile wardrobe piece. They can look refined and sophisticated, casual and effortless, or bold and fashion-forward – it all comes down to the pieces you pair them with. Whether your personal style leans toward classic elegance, minimalist chic, or everyday comfort, stirrup pants adapt with ease and serve as the foundation for countless expressive outfits.
To contents ▴Stirrup Pants: Design Features
Key design features of these stirrup pants:
- Close-fitting silhouette, made exclusively from stretch fabrics with a high elastane content.
- Stirrups at the hem, with no waistband or pockets.
- Center-front zipper closure.
- Waistline finished with a shaped facing.
- Topstitched crease lines.
The front and back views of the stirrup pants are shown in Fig. 2.
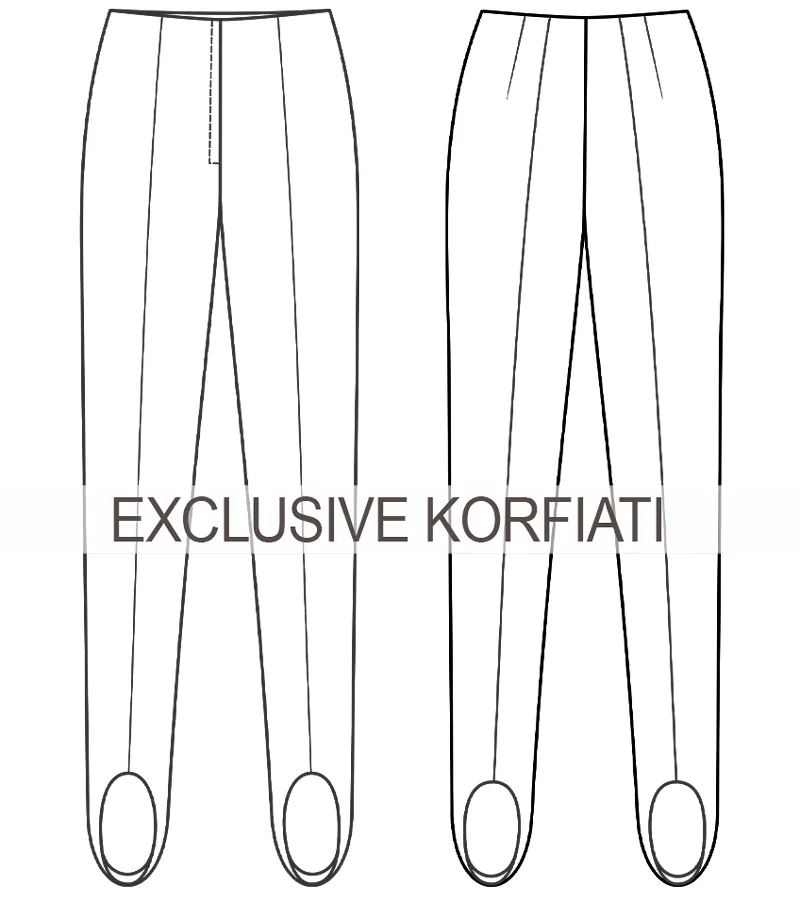
Fig. 2. Front and back views of the Stirrup Pants
How to Draft a Stirrup Pants Pattern
Drafting the Front Leg Pattern
- Waist: AA1 = 1/4 waist circumference − 0.5 cm (3/16 in).
- Hip: BB1 = 1/4 hip circumference − 10% (adjust slightly depending on fabric stretch).
- Knee: KK1 = 1/2 knee circumference − 0.5 cm (3/16 in).
- Hem: HH1 = 1/2 ankle circumference + 0.5 cm (3/16 in).
- Front crotch curve: From point C, measure 0.5 cm (3/16 in) to the left and 0.5 cm (3/16 in) straight up to locate point C1.
Connect the points to draw the side seam, inseam, and waist with smooth, natural curves.
Drafting the Front Stirrup
- From point H, draw a perpendicular line straight down: HE = 14 cm (5 1/2 in). Adjust slightly based on the wearer’s height and proportions.
- Stirrup width at the side: EE1 = 1.5 cm (9/16 in) and EE2 = 7.5 cm (3 in).
- From point H, draw a 3.5 cm (1 3/8 in) guide line bisecting the corner (along the diagonal).
Shape the left side of the stirrup: Start at E1, draw a vertical line up to E2, and blend into a smooth curve as shown in Fig. 1.
Trace the left half of the stirrup and flip/mirror it across the center line to form the right half.
To finish the waist edge, draft a 3 cm (1 3/16 in) wide shaped facing. Trace the facing pattern piece onto paper and cut it out separately.
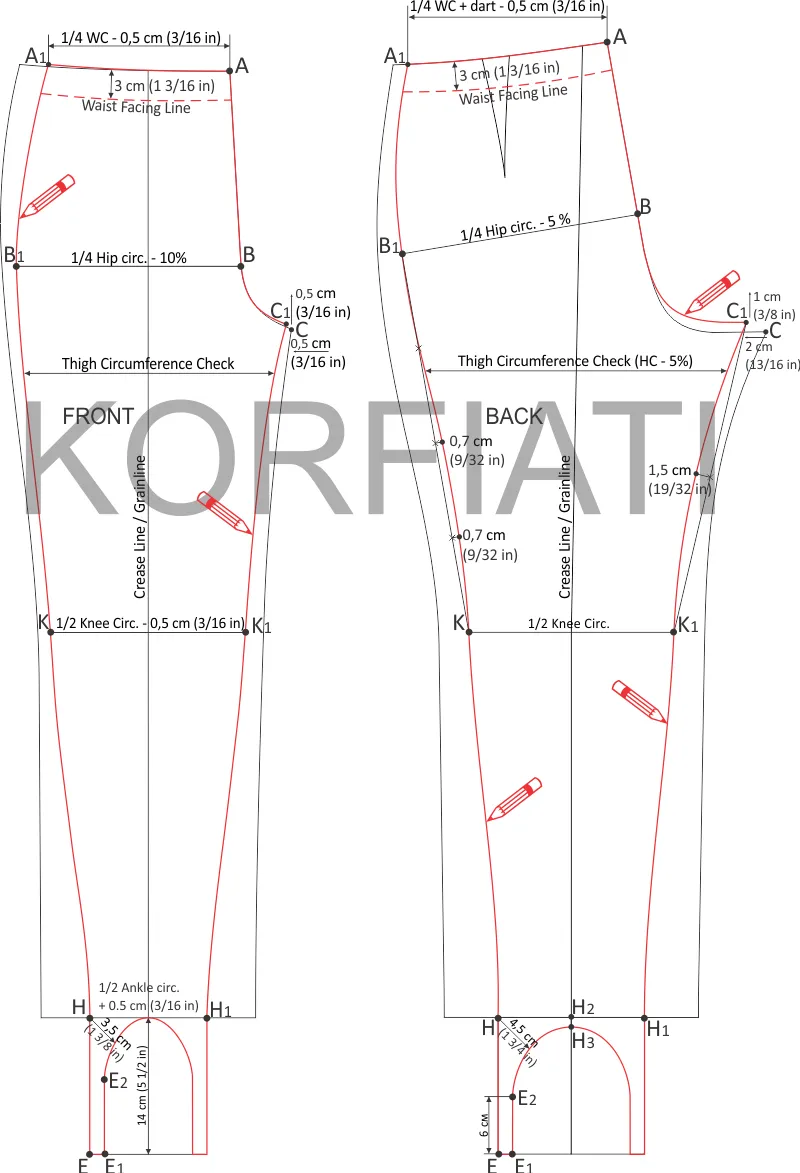
Fig. 3. Stirrup Pants Pattern
Drafting the Back Leg Pattern
- Waist: AA1 = 1/4 waist circumference + 3 cm (1 3/16 in) for dart, minus 0.5 cm (3/16 in).
- Hip: BB1 = 1/4 hip circumference − 5% (adjust slightly depending on fabric stretch).
- Knee: KK1 = 1/2 knee circumference.
- Hem: HH1 = 1/2 ankle circumference + 3.5 cm (1 3/8 in).
- Center back seam: From point C, measure 2 cm (13/16 in) to the left and 1 cm (3/8 in) straight up to locate point C1.
Construction Points
- Connect points B1 and K with a straight line. Divide segment B1–K into four equal parts. From each of the two lower division points, measure 0.7 cm (9/32 in) to the right.
- Connect points C1 and K1 with a straight line. Divide segment C1–K1 in half. From the midpoint, measure 1.5 cm (19/32 in) to the left.
- Connect the points to draw the side seam, inseam, and waist with smooth, natural curves.
Drafting the Back Stirrup
- From point H, draw a perpendicular line straight down: HE = 14 cm (5 1/2 in). Adjust slightly based on the wearer’s height and proportions.
- Stirrup width at the side: EE1 = 1.5 cm (9/16 in) and EE2 = 6 cm (2 3/8 in).
- From point H, draw a 4.5 cm (1 3/4 in) guide line bisecting the corner (along the diagonal).
- Measure H2H3 = 1 cm (3/8 in).
Shape the left side of the stirrup: Start at E1, draw a vertical line up to E2, and blend into a smooth curve as shown in Fig. 3.
Trace the left half of the stirrup and flip/mirror it across the center line to form the right half.
Thigh circumference check. After drafting the pattern, check the thigh circumference. The total thigh circumference (front and back combined) should be approximately equal to your actual thigh measurement minus 5%.
To contents ▴Materials & Notions
For the stirrup pants, you’ll need:
- Approximately 1.4 m (1 1/2 yd) of stretch polyester fabric, 145 cm (57–58 in) wide.
- One 16 cm (6 in) zipper.
- Fusible interfacing for the waist facings.
Recommended Fabrics
Use only stretch woven fabrics containing elastane (spandex) or heavyweight stretch knits.
Sewing Equipment
- 4-thread оverlock – for joining and finishing seams.
- Sewing machine — for attaching waist facings, hemming, and topstitching trouser creases.
Cutting Instructions
Cut the following pieces from the main fabric:
- Front – cut 2.
- Back – cut 2.
- Front Waist Facing – cut 2.
- Back Waist Facing – cut 1 on the fold.
- Zipper Fly Shield – cut 1.
Cut matching pieces of fusible interfacing for the front and back waist facings.
Lay out the pattern pieces on your fabric and cut them out, adding 1 cm (3/8 in) seam allowances along all edges.
Coming Up Next! We’ll publish a step-by-step sewing tutorial for these stirrup pants in our next lesson. Subscribe to the Korfiati Sewing School newsletter and join us in creating stylish clothes of your own!


No Comments